DueUtil Tutorial/Walkthrough
Use the dueutil homepage or the other dueutil homepage to view your bot information, and the new website to view tutorials and more!
Early-game
Getting Started
As soon as the bot sees you send a message in one of its servers, it will create your account. To view your basic profile, you can use !myinfo.
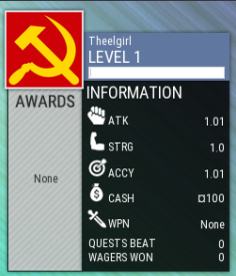
This is your basic profile.
Next to your avatar is your banner that has your battlename (it will be by default the first username the bot sees you with), level and current EXP shown on it. Current EXP is only shown when the gray bar reaches far enough to display it.
On the left you can see the last eight awards you got (starting at the top left with the most recent).
In the information section you can see your stats, cash, equipped weapon and wager/quest stats.
Your profile can be customized with themes, banners and backgrounds (More on that later.)
If you want to increase your stats early on, you can do !train, !hardtrain, and/or !insanetrain. These can be used every 4 hours, 8 hours, and 12 hours, respectively. To get a bit of DUT (cash) to spend, you can do !daily.
Quests
|
Quests are the main way to get stats, and they are the only way to get exp as of December 7th, 2019. Every 5 minutes, you get a base 25% chance of a quest spawn, and each time you don't get a quest, your chance to get one next time increases by 12.5%. You must send a message to actually receive the quest. When you do get a quest, the bot will send an alert that will look like this:
|
|
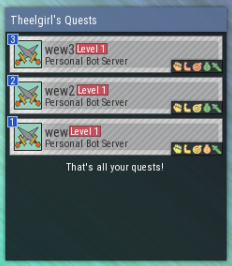
To see a list of your quests, you can do !myquests. That will send out a picture of all your quests, along with a blue number indicating the number for you to accept it with. The five little multi-color icons for each quest indicate how difficult the stat of the quest is. The redder it is, the higher that stat is for the quest. |
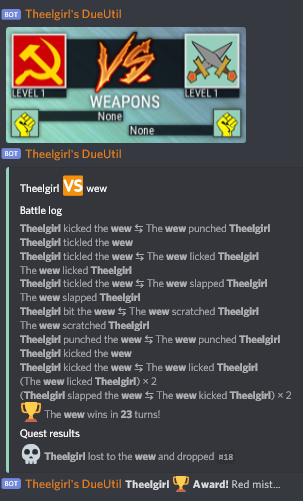
To accept a quest, do !acceptquest <quest number>. The bot will send you the quest results, and tell you whether you lost, or won, and how many stats you gained if you won. Starting out, you'll probably lose a few quests, as it's quite common at first. You'll always have a chance of losing quests, but as time goes on and you keep playing, you'll get a better idea of whether you'll beat a quest.
Weapons
Weapons are helpful little tools you can use to beat quests/battles. At higher levels, most quests are unbeatable without a weapon! That means you should get one ASAP. Weapons in the shop are server-specific, so each server will have a different selection of weapons in its shop. However, when you buy a weapon, you can use it anywhere.
|
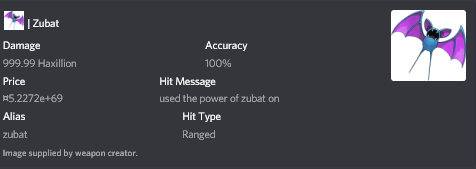
This is an example weapon, and you can view weapon stats like this with !myweapons <weapon name>. You can also view these stats but for weapons you haven't bought yet with !shop <weapon name>. However, you won't be able to make weapons with over 86% accuracy, or above 10 Tredecillion damage, this was just manually edited in the code ;) |
If you've finally found a weapon you want to buy, you can do !buy <weapon name>. As of December 7th, 2019, you can store unlimited weapons, however it may be limited in the future. To equip a weapon, use !equip <weapon name>. This will automatically unequip your current weapon, and put it in your inventory.
Shields
Shields work exactly the same as weapons, except instead of doing damage and having a certain chance to hit, they reduce damage, and have a certain chance to reduce a hit's damage. Relevant commands include !shop shields, !myshields, !shieldequip <shield name>, and !shieldunequip.
Teams
Teams are a game mechanic intended to help users join together to become stronger. You can join a team to represent your team in topdog battles, but it's mainly to earn teamcash. Teamcash is another nice mechanic that you can use to buy a lot of upgrades. When you're in a team, you earn 1 teamcash per quest you beat (DUP, aka prestige coins, can boost that, but we'll get to that later). You can also create your own team with !createteam, however you need to earn 100 teamcash in an existing team first. If you're a team owner, you can also promote and demote users between normal member, elder, and co-leader with !promote and !demote. If you're just a member or elder though, you can use !homeinvite to get an invite to your teams home server, so you can play with your teammates.
|
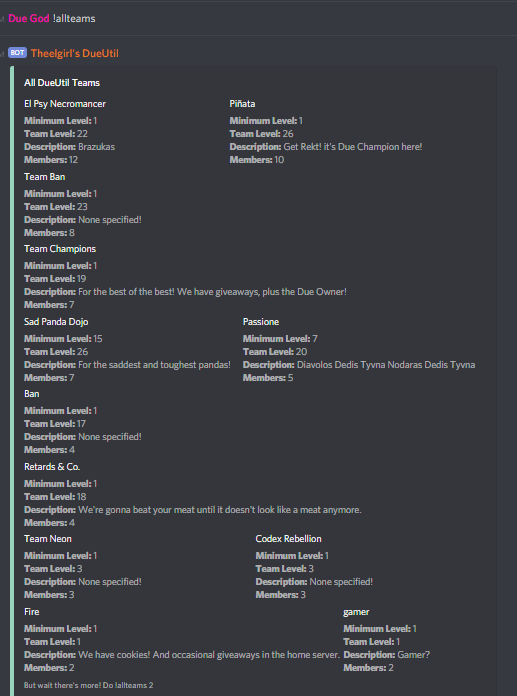
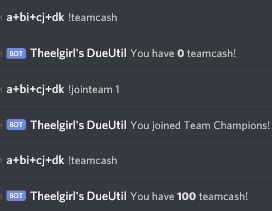
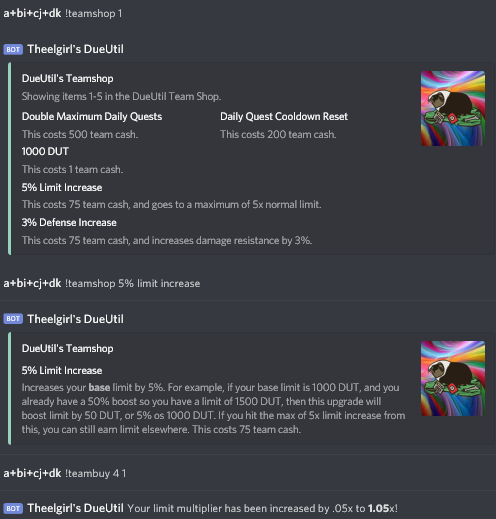
This here is an example of all the top teams, found with !allteams. Notice that it lists a brief description of each team as well. !allteams has sort options that you can see with !help allteams. This is a screenshot showing how you join a team on the old system. With the new system, to join Team Champions, you'd have to do !jointeam Team Champions, and you wouldn't get any teamcash to start. This is a picture of how you can view items in the teamshop, and use !teambuy <item number> <amount of item> to buy upgrades with teamcash. |
Jobs
Jobs are extremely useful for saving up currency, and especially for earning DUP without actually prestiging. You need to use !learn though, to get jobs. The higher your education tier is (you get education through learning), the more jobs you can join, and the higher the education tier required, the higher the bonus. All jobs have some sort of bonus in battles/learning, in addition to letting you use !toil <currency> to gain DUT, DUP, stats, or job level. For example, the Head Teacher job gives you an extra education tier each time you learn, and the Doctor job heals you in battles.

These are a list of all jobs, and every other job is bolded to make it easier to read. In addition, it shows the temporary repercussions of learning, which is a short period in which you cannot gain quests from chatting. The bot will DM you when you're done learning, so that you know when you can get quests again.
Now that you've seen how you can get education to join jobs, it's time to see how to actually join a job and get rewards. When you have enough education, you can go !joinjob <job name> to join it, and collect benefits. When you have a job, you can do !toil <currency> to toil to get rewards. The valid currencies are listed in !help toil. You can also see how much of each currency you can collect with !jobstats <job name>. You should use the name of a job you have, as that should display the accurate amount you'll gain.
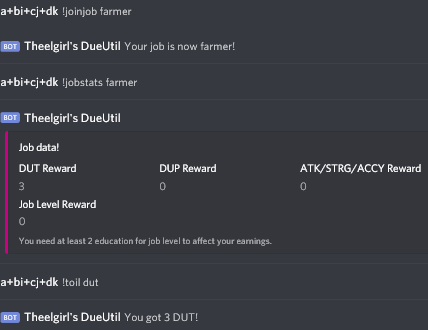
Here, you can see how you join a job. Once you join a job, you'll start to collect rewards, and you can view those potential rewards with !jobstats <job name>. Then, you can toil with the name of the reward you want to actually collect the reward.
Mid-game
Dummies
Dummies are an amazing feature for training up stats that you otherwise couldn't, such as limit, hp modifier, and/or defense. You can use a dummy every 15 minutes, and you have a base chance of 10% to get one from a quest that you beat (teamcash can upgrade it to 30%). At the beginning, dummies don't increase the stat you choose by much, however the amount they give goes up as the stat goes up (dummies increase your stat between .2% and .3% of its current value). You can use a dummy with !usedummy <stat>. For stats, you can choose atk, strg, accy, defense, hp, limit, or prestige. You can also buy dummies for 50,000 DUT each with !buydummy <number of dummies>. Lastly, you can view how many dummies you have with !mydummies.
Late-Game
Prestiging
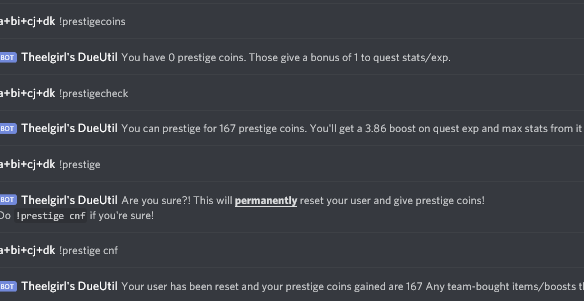
Eventually, you'll hit a point where you either can't progress any farther, or it takes too long to level up and it gets boring. That's where prestiging comes in. At level 80, you'll be able to prestige for DUP, or prestige coins. Prestiging resets your level, exp, cash, weapons, and teamshop upgrades, but you keep your current prestige coins and prestigeshop upgrades. DUP gives a large variety of bonuses, including, but not limited to, extra limit, higher max stats per quest (over +100 each), more exp per quest, and more teamcash per quest.
|
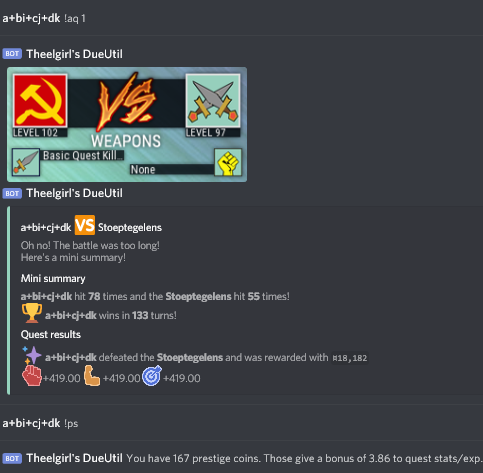
This is an example of prestiging. Notice you have to confirm you want to prestige by doing !prestige cnf, as this can be a consequential command. This is an example of beating a quest after prestiging. Notice that the stats are capped at +419 each for this particular instance, however the cap can vary for different people. |

